
27 Bathroom Sink Backsplash Ideas That Are Actually Doable
Staring at that bare, water-stained wall behind your bathroom sink? Yeah, I’ve been there, and it’s not a good look. A good backsplash isn’t just decoration — it’s the thing standing between your drywall and a slow, splashy death by toothpaste spatter and soap scum. I’ve torn out and redone more than a few of these over the years, and I’m sharing every trick, tile, and shortcut that actually held up.
Whether you’ve got a tiny pedestal sink or a double vanity that eats up half the room, there’s a version of this project sized for you. Some of these are weekend DIY jobs, others are call-a-tiler projects, but all of them will make your bathroom look pulled together instead of half-finished. Let’s get into it.
1. Classic Subway Tile Backsplash

You really can’t go wrong with subway tile — it’s the little black dress of bathroom design. Clean, rectangular lines make any sink area look tidier, and it plays nice with basically every vanity style out there, from farmhouse to sleek and modern. I used it in my own powder room because I didn’t want to overthink the decision, and honestly? Zero regrets. It’s forgiving on installation mistakes too, which matters if this is your first tile job.
- Pair white subway tile with dark grout for a graphic look
- Stack it vertically for a slightly different spin
- Extend it a few inches wider than the sink for balance
2. Marble Slab Behind the Sink
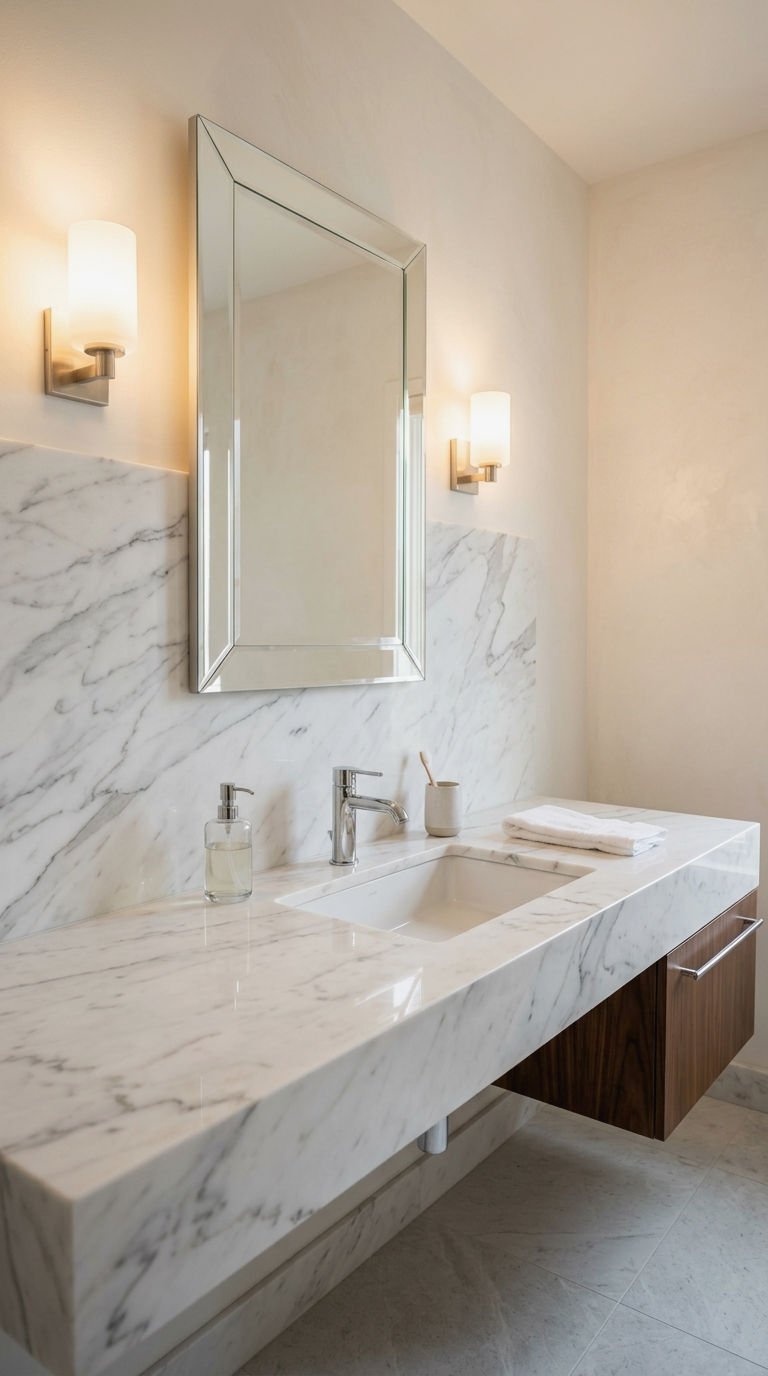
Want your bathroom to look expensive without a full renovation budget? A marble slab backsplash does exactly that. Instead of grout lines everywhere, you get one continuous swoop of stone with natural veining that looks like art. It’s pricier upfront, but there’s zero grout to scrub, which IMO makes it worth every penny.
- Match the slab to your countertop for a seamless look
- Choose engineered marble if you want the veining without the staining risk
- Keep the edges polished for a soft, finished feel
3. Small Bathroom Backsplash Solutions
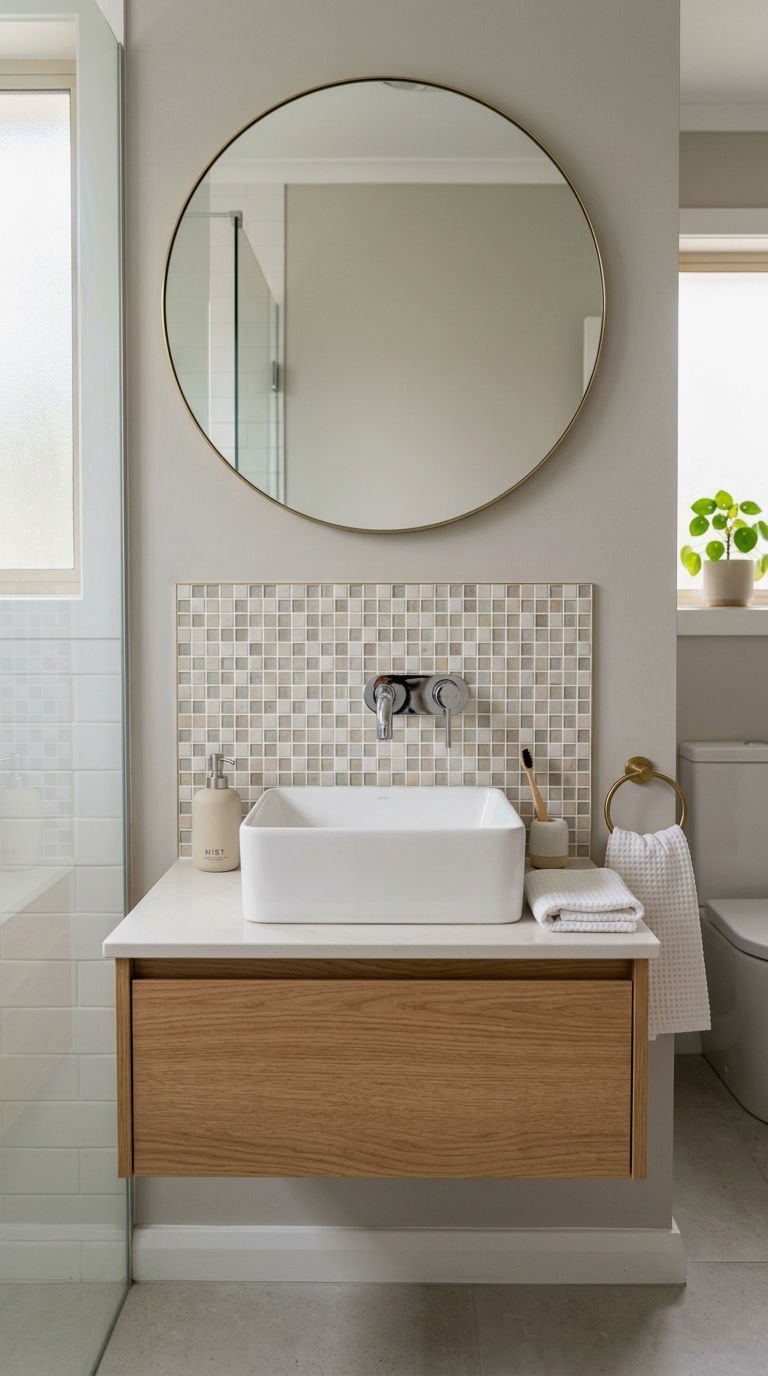
Tiny bathroom, tiny budget, tiny patience for a big project — I get it. A small sink doesn’t mean you’re stuck with a boring wall. Go for a mini mosaic sheet or a single accent panel sized just to the sink footprint. It draws the eye without demanding a full wall of tile or a weekend lost to grout lines.
- Use light colors to keep the space feeling open
- Stick to one tile size to avoid visual clutter
- Frame it with simple trim for a finished edge
4. DIY Peel and Stick Backsplash
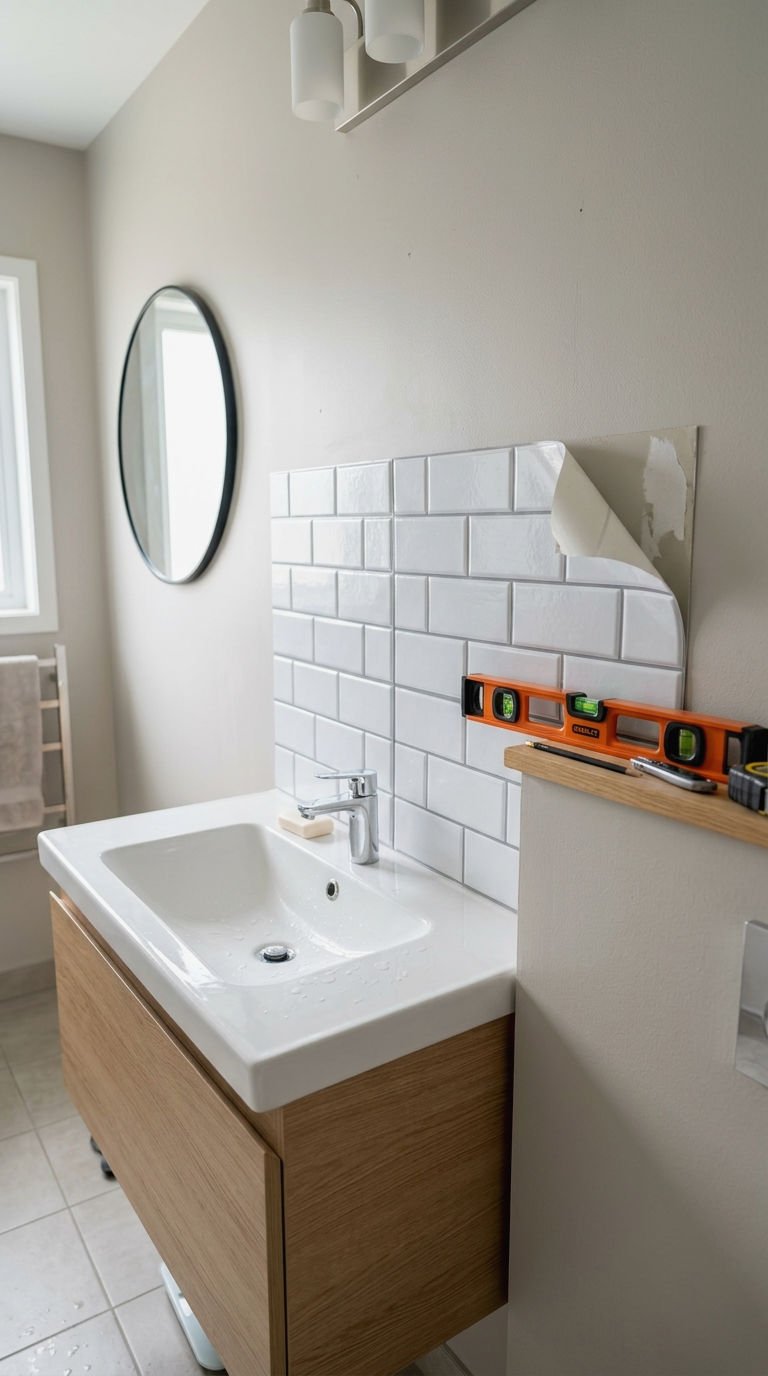
Renting? Broke? Simply allergic to thin-set mortar? Peel and stick tile is your friend. These self-adhesive panels mimic real tile, stone, or even metal, and you can install a whole backsplash in an afternoon with nothing but scissors and a level. It’s genuinely one of the easiest wins in this whole list.
- Clean and dry the wall thoroughly before applying
- Use a sharp blade for clean cuts around fixtures
- Seal the edges with clear caulk for extra durability
5. Master Bath Backsplash Upgrade

Your primary bathroom deserves more than a leftover tile scrap from the kitchen reno. A larger format tile or a two-tone design instantly makes a master bath feel like a retreat rather than an afterthought. Since you’re likely spending real time in this room, it’s worth splurging on materials that photograph well and hold up daily.
- Choose a tile that echoes your shower surround for cohesion
- Add a thin metal trim strip for a custom, finished look
- Go floor to ceiling if the wall allows it
6. Double Sink Vanity Backsplash
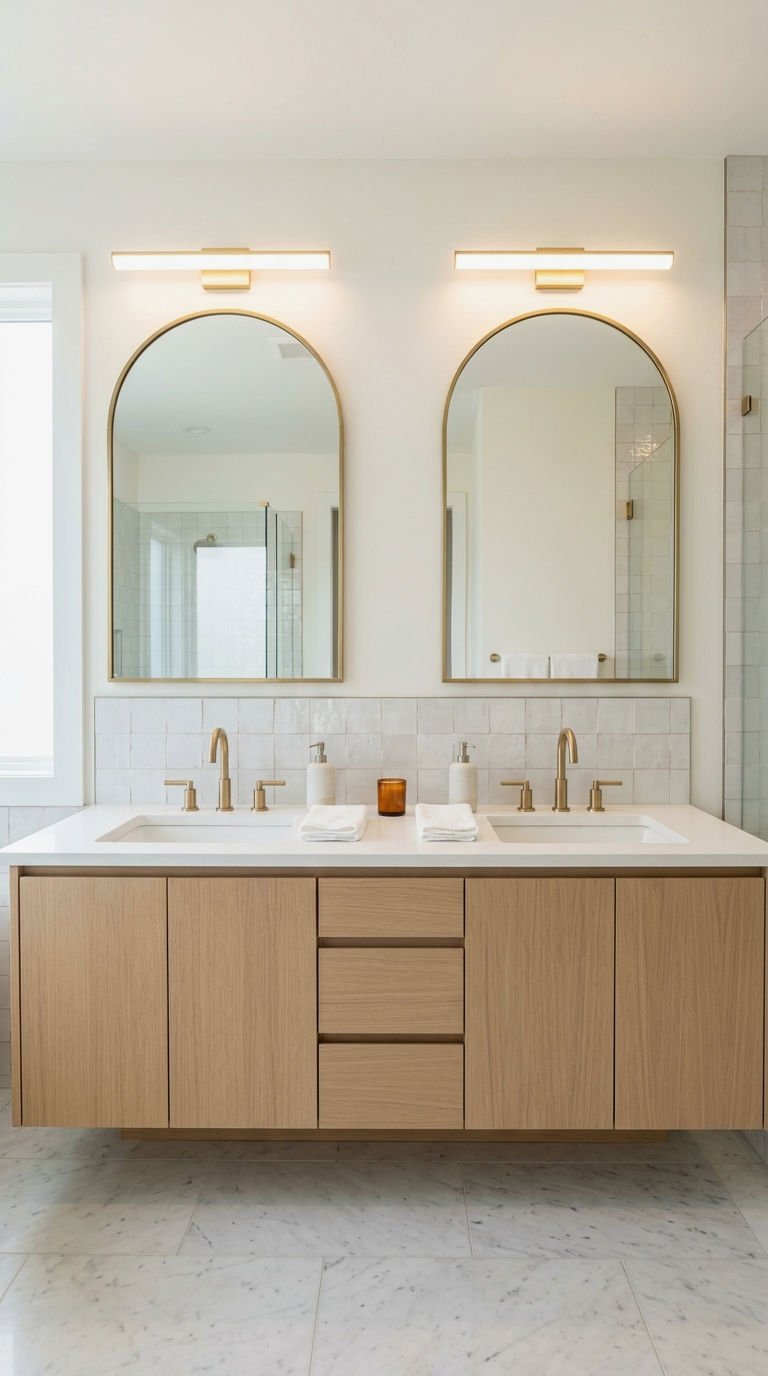
Two sinks means twice the splash zone, so plan accordingly. Running one continuous backsplash across a double vanity ties both sink areas together instead of making them feel like separate stations. I’ve found that a single unbroken design reads way more polished than two mismatched squares behind each faucet.
- Center the pattern between both sinks for symmetry
- Use a slightly taller backsplash to catch more overspray
- Keep hardware finishes consistent across both sides
7. Pedestal Sink Backsplash Options
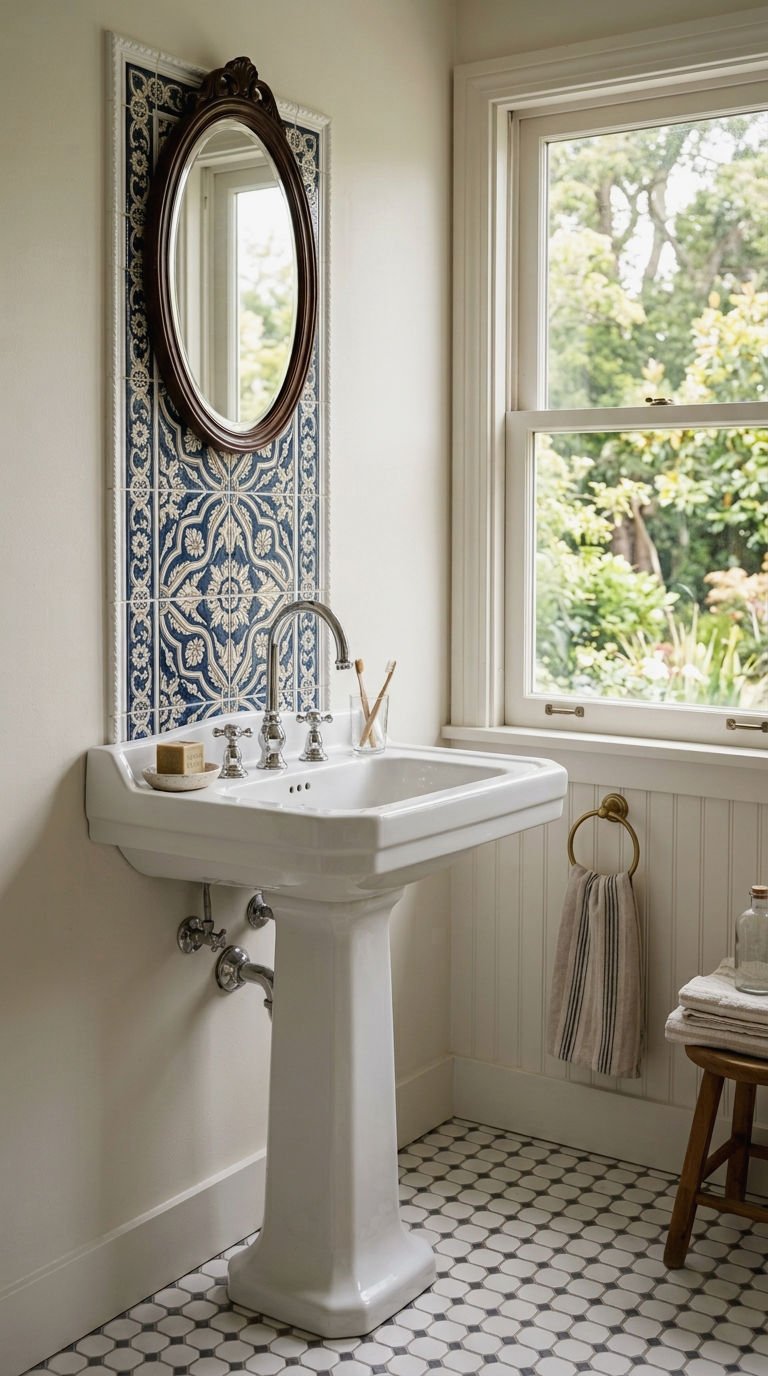
Pedestal sinks are gorgeous but notoriously splash-happy since there’s no counter to catch drips. A tall, narrow tile panel mounted right behind the faucet solves that without needing a full vanity wall. Ever wonder why old houses with pedestal sinks always had a tiled section behind them? Now you know — it’s function dressed up as style.
- Match the panel width to the sink’s basin, not the pedestal
- Use a mirror-adjacent design so it doesn’t compete with wall decor
- Consider beadboard with a tile cap for a cottage feel
8. Crisp White Tile Backsplash
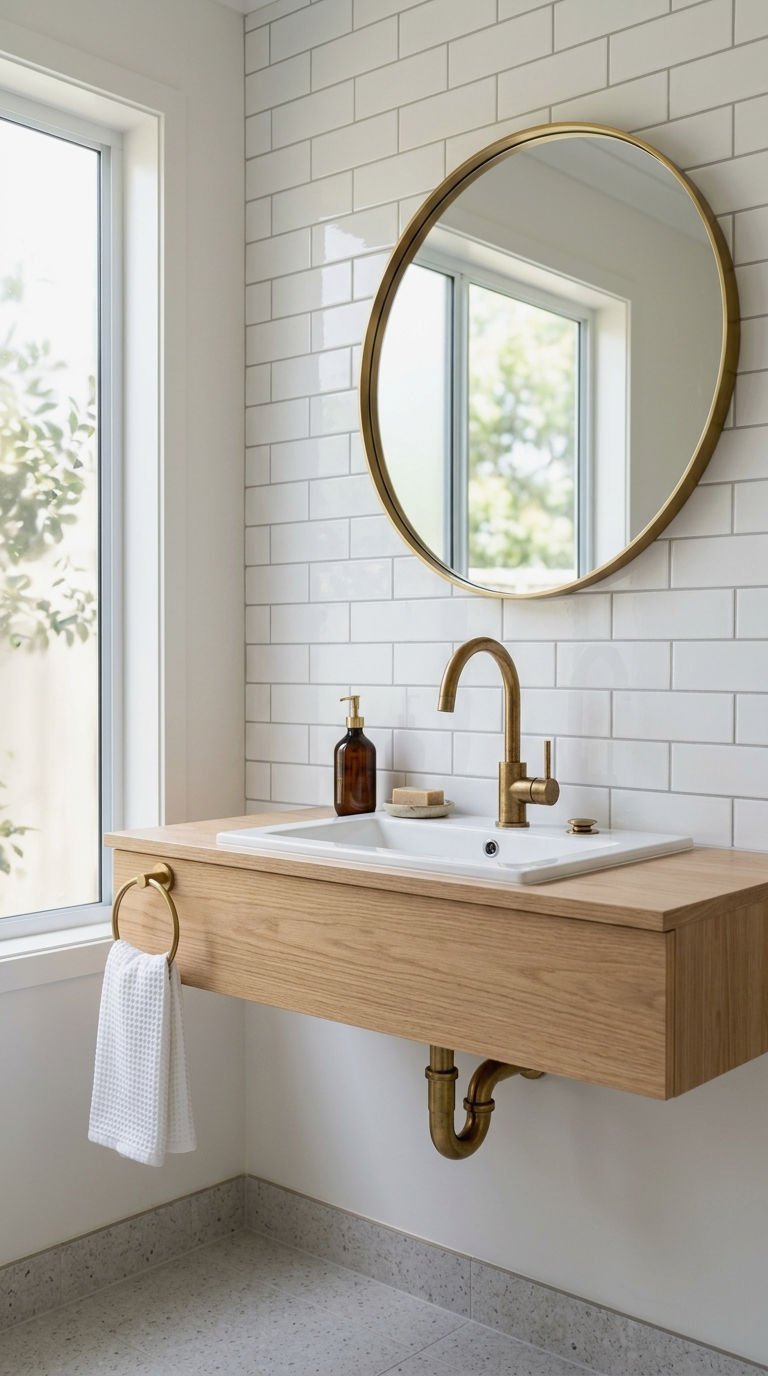
Sometimes simple really is better. White tile brightens a small or windowless bathroom instantly and makes the whole space feel cleaner, even five minutes after someone’s used it. It’s also the easiest backdrop to change your bathroom’s whole vibe later just by swapping towels or hardware.
- Try a glossy finish to bounce more light around
- Add texture with a slightly raised or handmade-look tile
- Pair with brass or black fixtures for contrast
9. Modern Hexagon Tile Backsplash
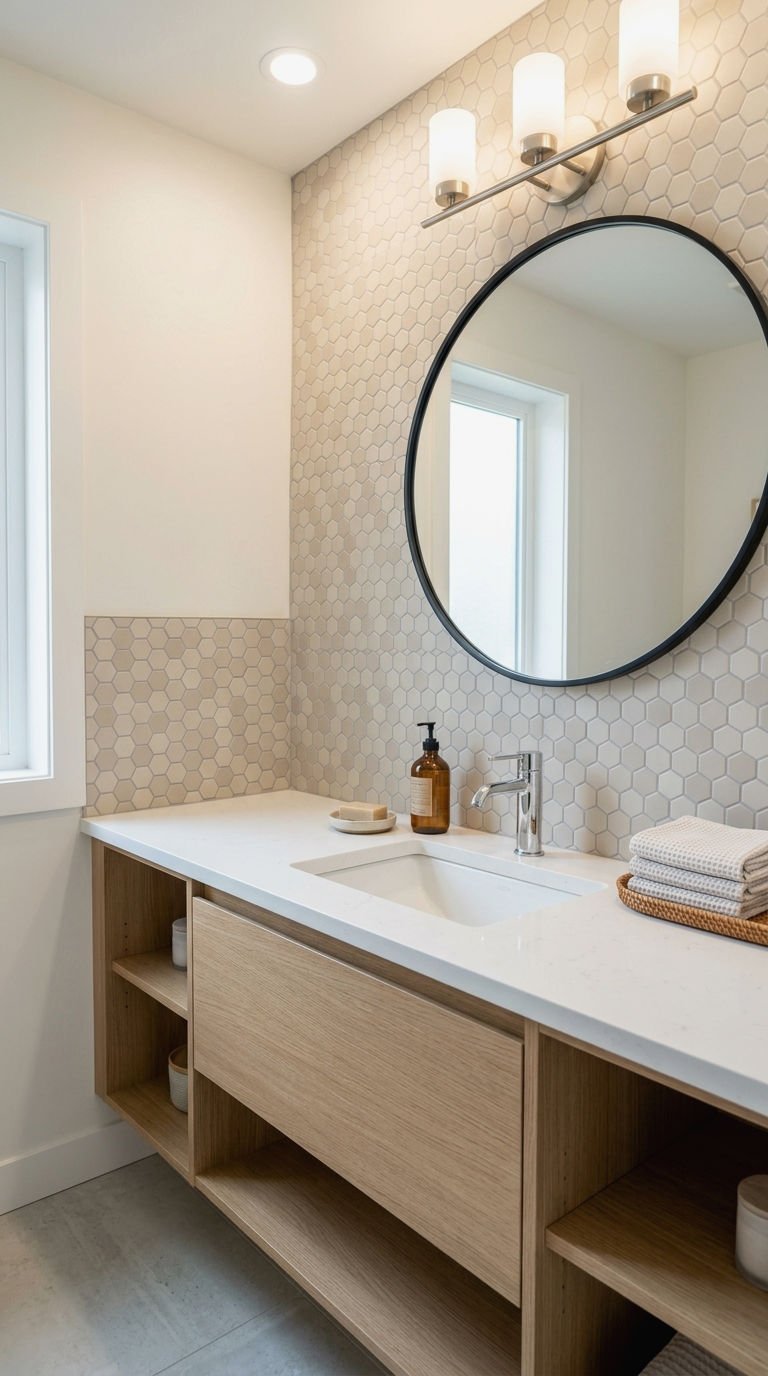
Hexagon tile brings geometry into a bathroom without going full modern-art-gallery on your walls. The repeating shape adds movement and visual interest behind the sink while still feeling calm rather than chaotic. It’s become a go-to for a reason — it just works in almost every design style.
- Use a single color for a subtle, textural effect
- Mix two tones for a honeycomb pattern
- Keep grout lines thin for a more refined finish
10. Bold Geometric Tile Backsplash

If you want your sink wall to actually be the star of the room, geometric tile delivers. Chevron, diamond, or Moroccan-inspired patterns turn a purely functional surface into a genuine design statement. This is the pick for anyone who thinks a plain tile wall is a wasted opportunity.
- Balance a busy pattern with simple, plain fixtures
- Keep the rest of the bathroom palette neutral
- Use pattern only behind the sink to avoid overwhelming the room
11. Glass Tile Backsplash Accent

Glass tile catches light in a way ceramic just can’t compete with, giving your sink area a subtle shimmer throughout the day. It’s a great option if your bathroom doesn’t get much natural light and needs a little visual energy. Plus, it wipes clean in seconds, which matters more than most people admit.
- Choose iridescent tile for a soft, shifting color effect
- Combine with stone for texture and contrast
- Avoid dark grout, which can dull the glass’s sparkle
12. Mosaic Tile Backsplash Design
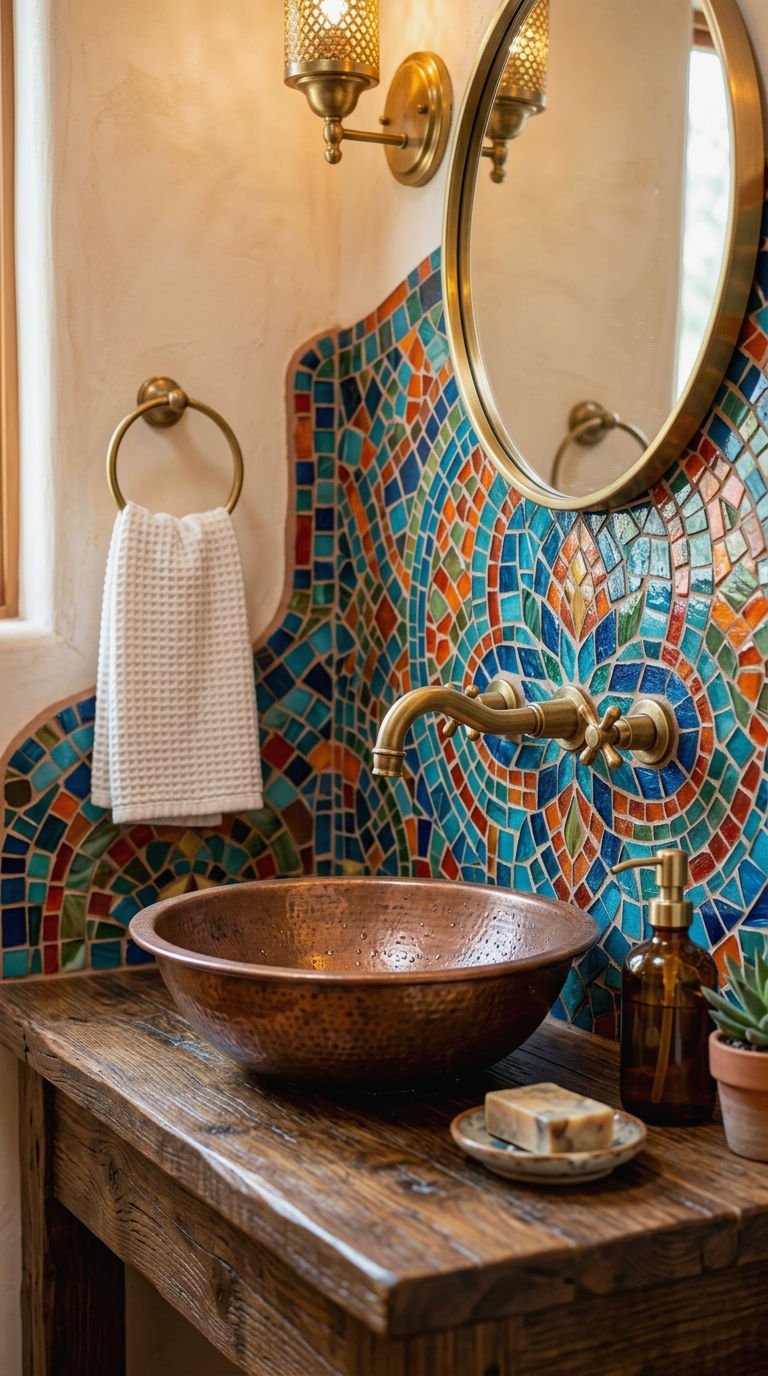
Mosaic sheets are the multitaskers of the tile world — small enough to wrap around curves, plumbing, and odd angles that trip up larger tiles. They’re also just fun, letting you mix colors and textures in one cohesive sheet instead of hand-placing dozens of pieces. Great pick if your sink area has an awkward layout.
- Pick a mosaic with a unifying color thread
- Use it as a border around larger field tile
- Keep the pattern simple if the room already has a lot going on
13. Decorative Statement Backsplash Tile
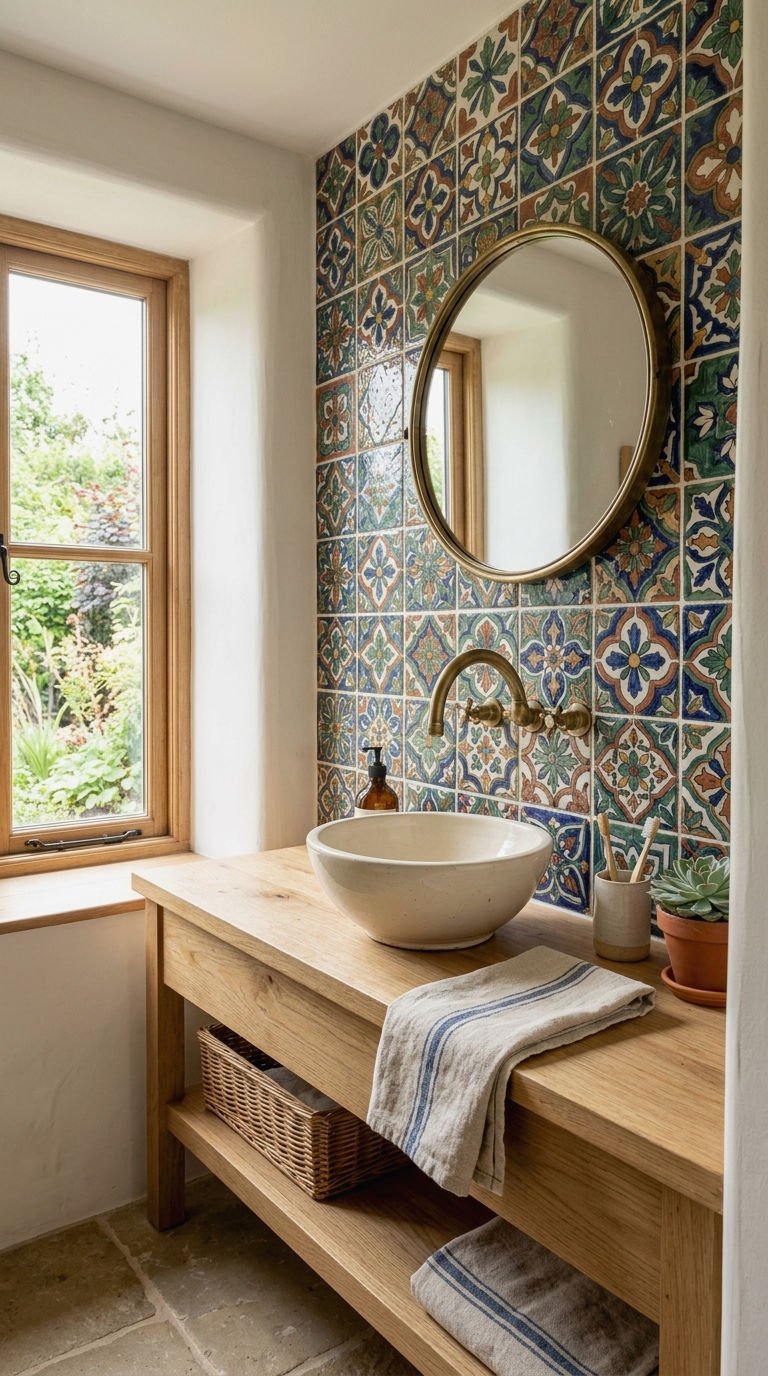
Every once in a while, a bathroom needs a wall that makes people stop and look. A hand-painted or patterned decorative tile behind the sink does exactly that, turning a purely practical spot into the room’s focal point. This isn’t the safe choice, but it’s the memorable one.
- Limit decorative tile to just the sink wall
- Keep countertops and hardware simple so the tile doesn’t compete
- Choose a design that echoes another accent already in the room
14. How to Caulk Your Backsplash
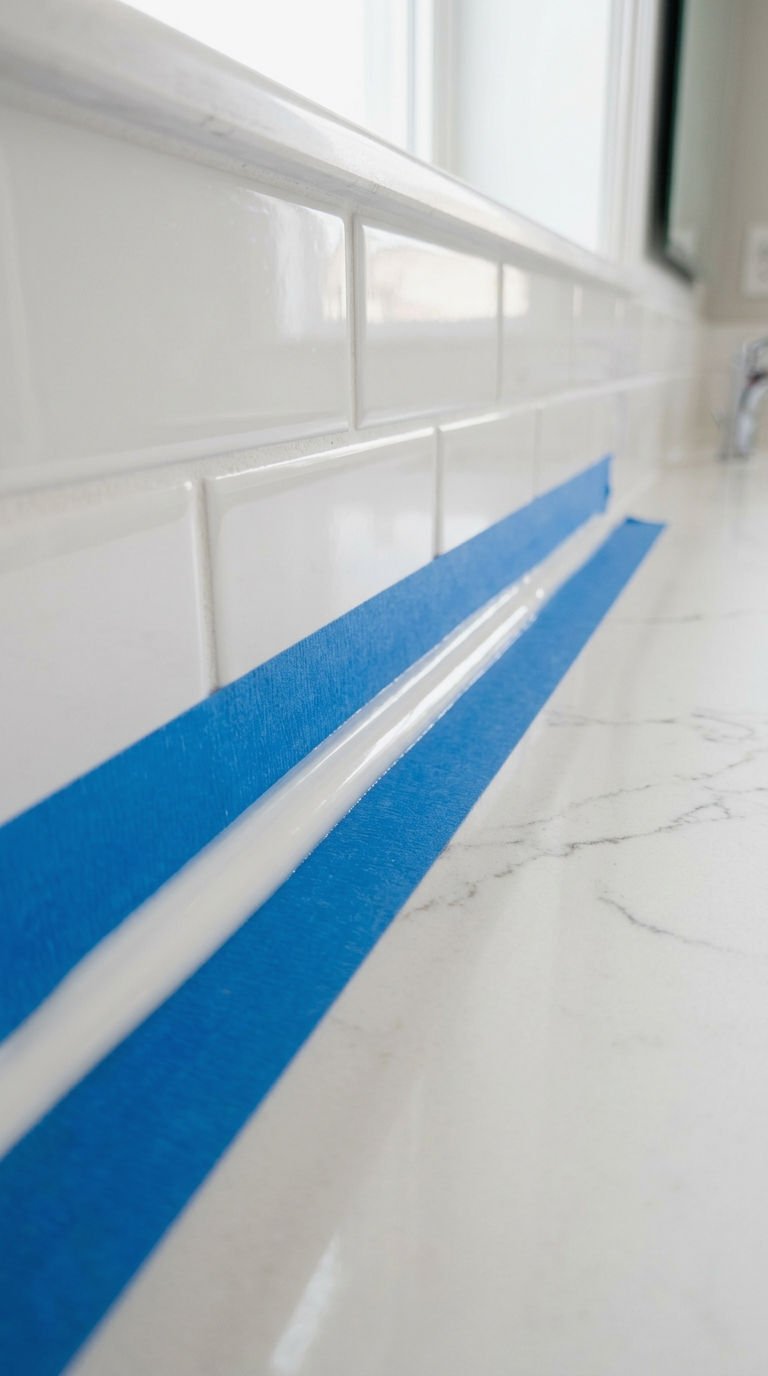
Even the prettiest tile job falls apart — literally — without proper caulking at the seams. A clean bead of silicone caulk along the countertop and wall junction keeps water from sneaking behind your backsplash and warping the drywall. It’s a five-minute task that saves you from a much bigger repair later.
- Use painter’s tape for crisp, straight caulk lines
- Choose mildew-resistant silicone made for wet areas
- Smooth the bead with a wet finger or caulk tool immediately
15. 24 Inch Vanity with Backsplash
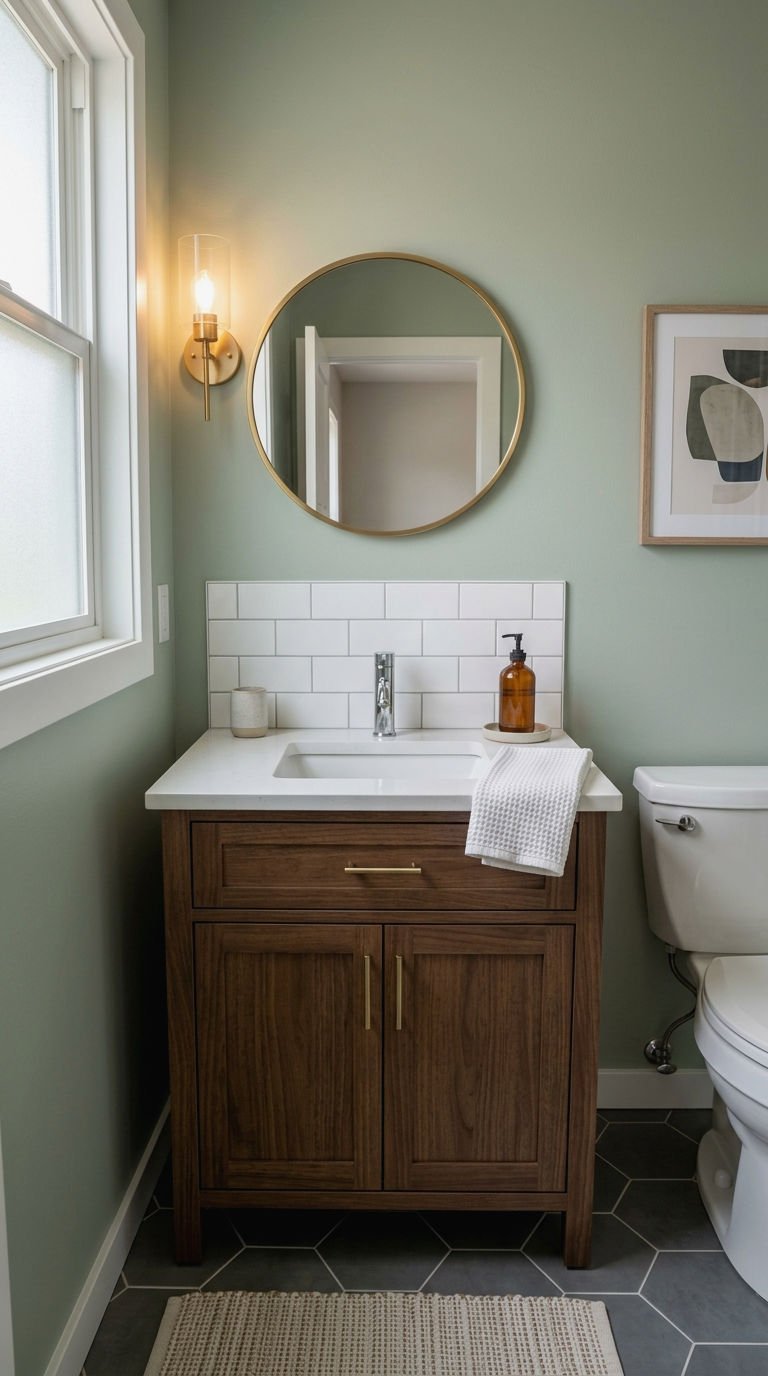
Compact vanities around 24 inches are common in guest baths and powder rooms, and they need a backsplash sized to match, not borrowed from a bigger design. A proportional backsplash keeps the small footprint from feeling cramped or mismatched. Scale matters more than people expect in tight spaces.
- Keep the backsplash height around 4 to 6 inches for a compact vanity
- Match the tile to the vanity’s existing hardware tone
- Avoid oversized tile that overwhelms a small surface
16. Vanity with Built In Backsplash
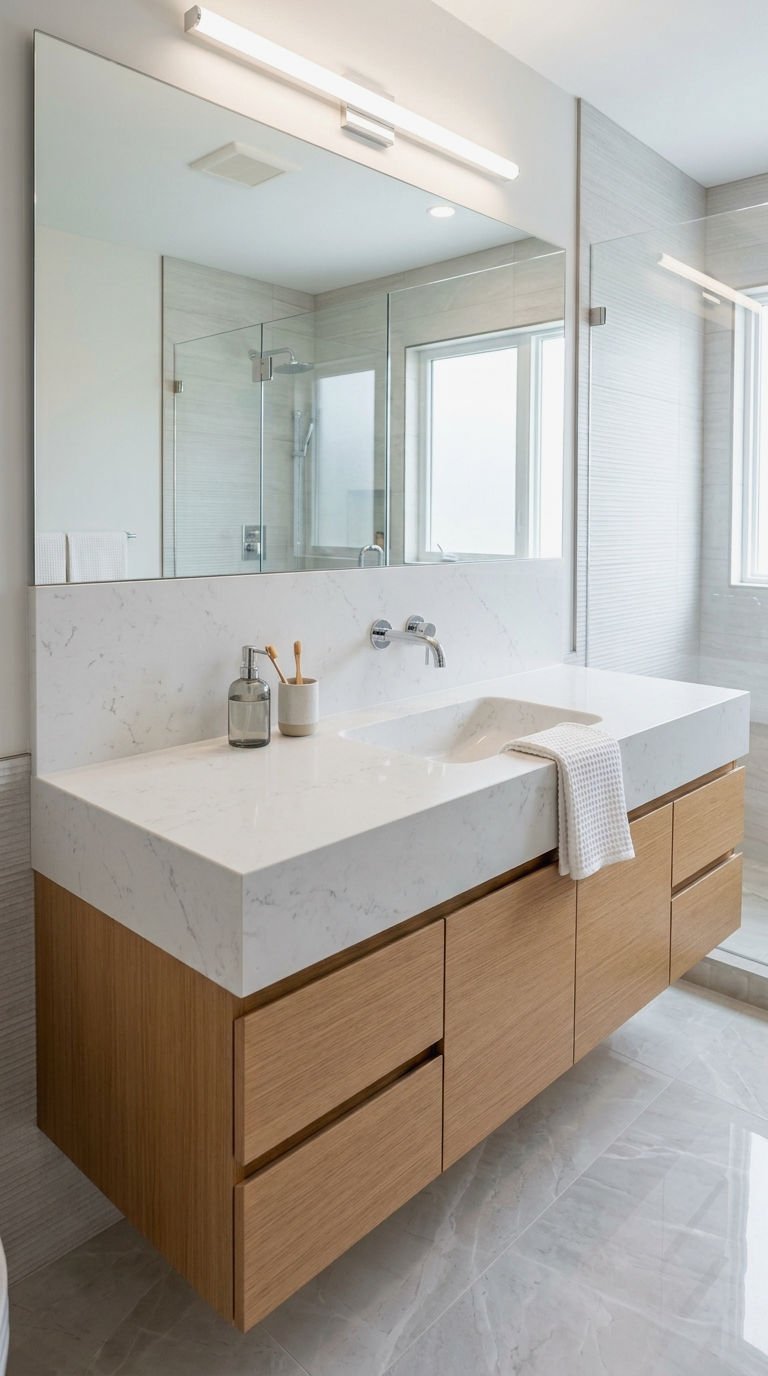
Some vanities come with an integrated backsplash already molded into the countertop, which honestly makes life easier. There’s no seam to caulk separately and no grout to maintain, just one continuous surface. If you’re buying new rather than renovating around an existing sink, this is worth considering.
- Choose a quartz or solid-surface top for a seamless build
- Confirm the backsplash height suits your mirror placement
- Skip additional tile if the built-in style is already busy
17. Fully Tiled Sink Backsplash
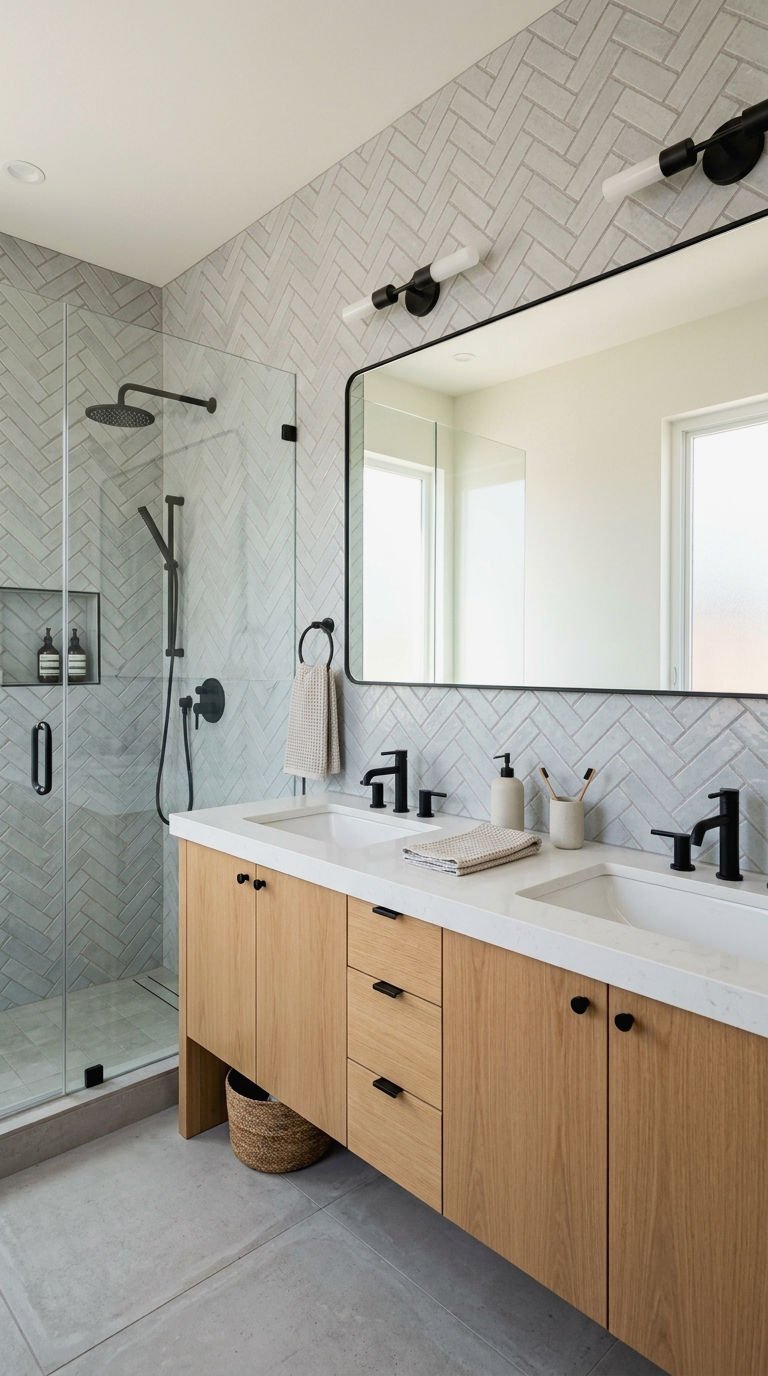
Going floor to ceiling — or at least counter to mirror — with tile turns your sink wall into a genuine design feature rather than a small strip behind the faucet. It also protects way more wall surface from daily splashes, which your drywall will thank you for later. This is the move for anyone who wants maximum impact.
- Use the same tile as your shower for a cohesive bathroom
- Add a shelf ledge partway up for small storage
- Keep the tile pattern simple if covering a large area
18. Full Height Wall Backsplash
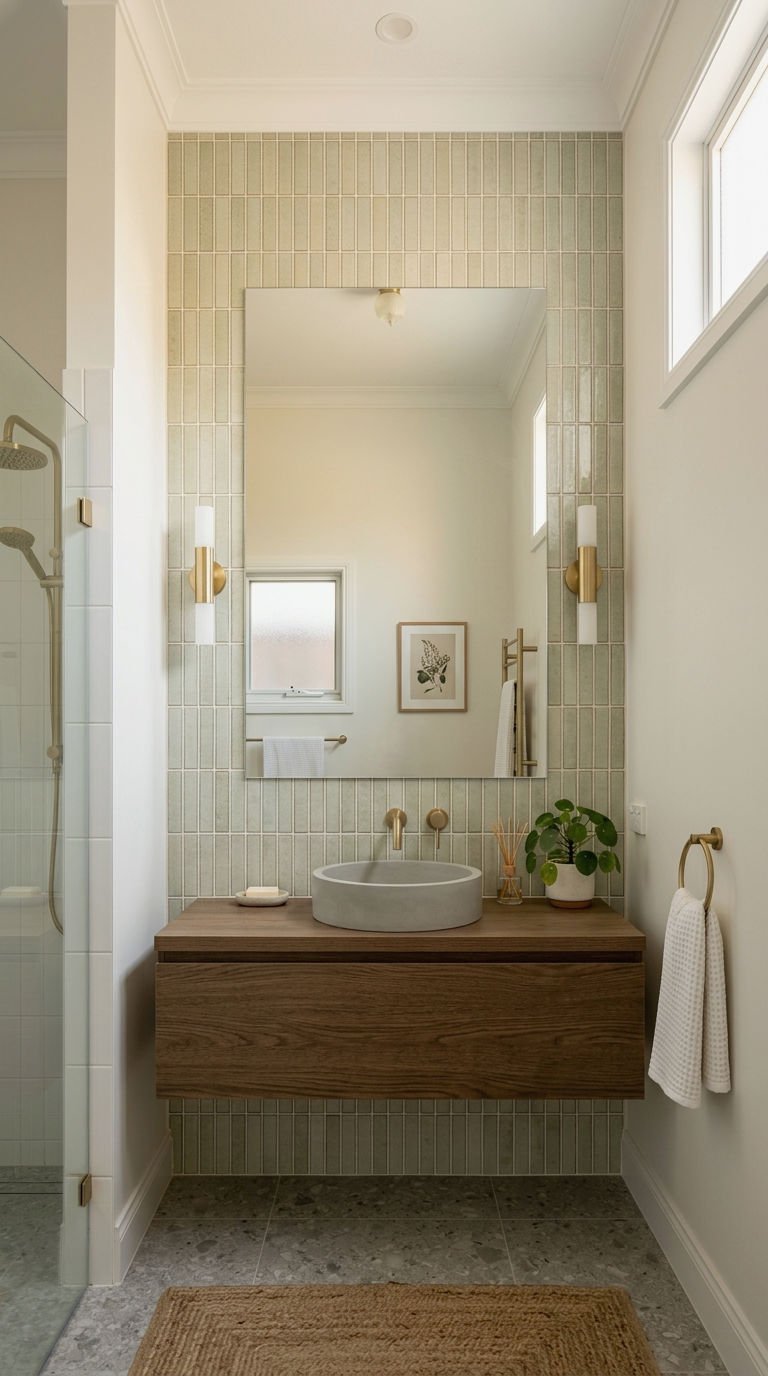
Similar to a fully tiled wall, but this version stretches the backsplash from countertop to ceiling in one continuous run, skipping the mirror entirely in favor of a wall-mounted one instead. It’s a striking, modern approach that makes a small bathroom feel taller than it actually is.
- Choose a vertical tile pattern to emphasize height
- Add a mounted mirror rather than a recessed medicine cabinet
- Keep lighting fixtures simple so they don’t clutter the wall
19. Simple Half Tile Backsplash
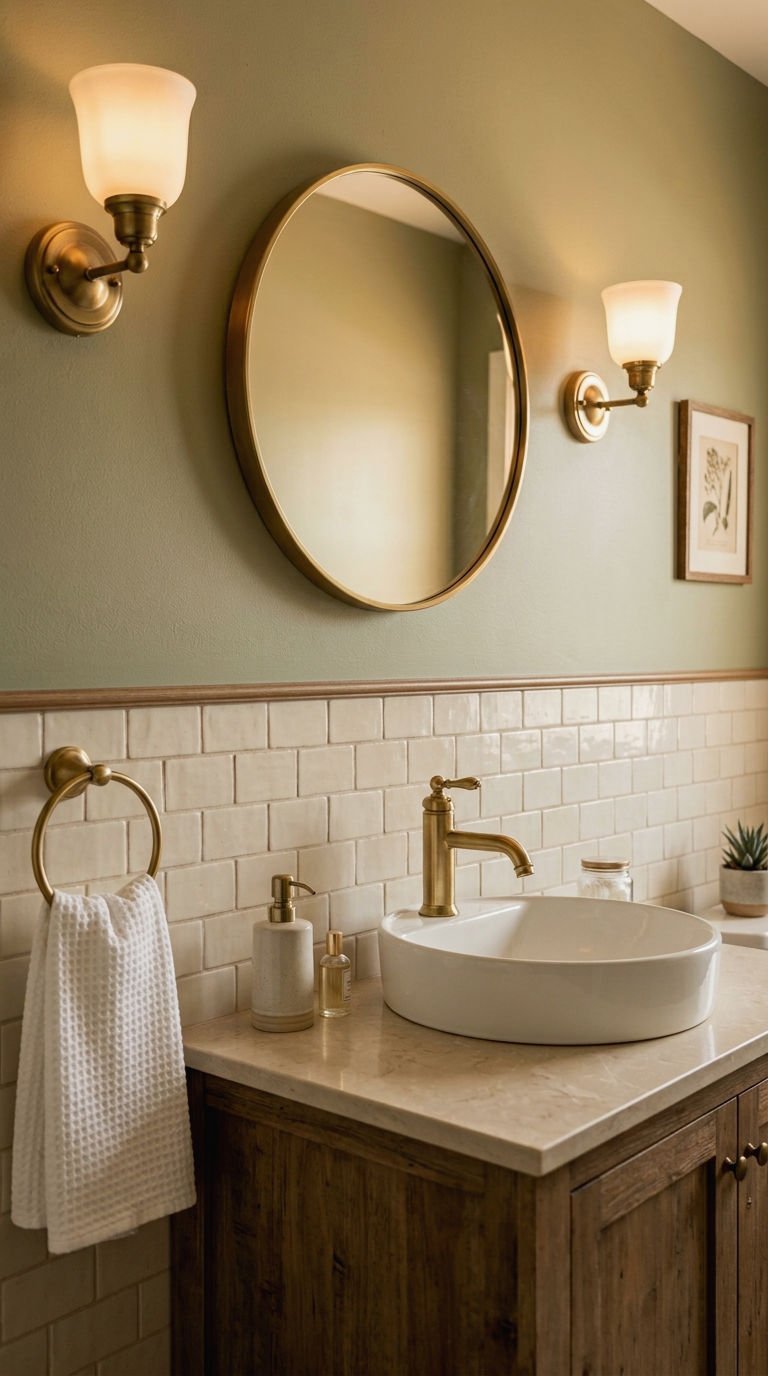
Not every bathroom needs a dramatic tile moment, and a half-height backsplash covers the practical splash zone without turning into a big production. It’s budget-friendly, quick to install, and still gives your sink wall a finished, intentional look instead of a bare patch above the counter.
- Keep the height around 12 to 18 inches for good coverage
- Add a simple pencil trim tile along the top edge
- Pair with painted wall above for contrast
20. Herringbone Pattern Tile Backsplash
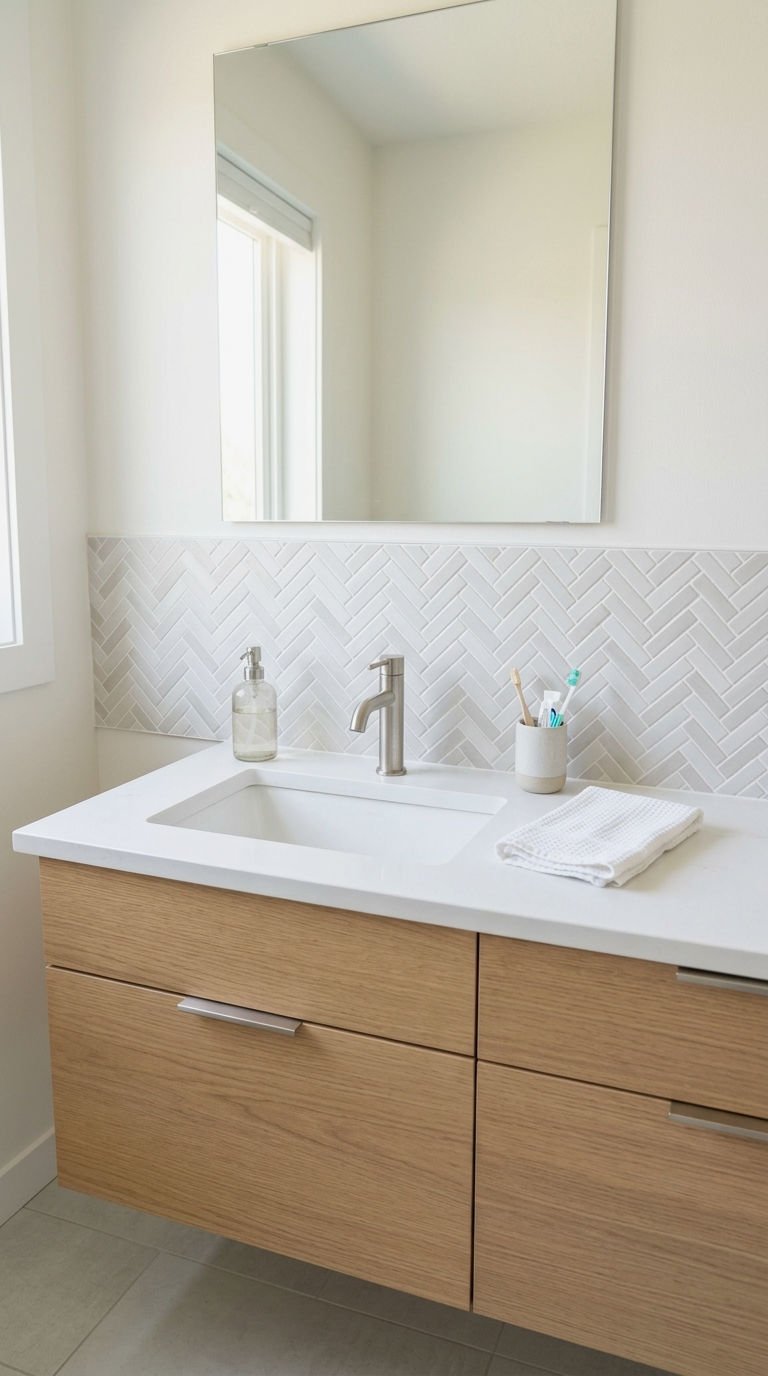
Herringbone brings movement to a bathroom without needing bold color, since the zigzag pattern itself does all the visual work. It’s a slightly trickier install than straight-lay tile, but the payoff is a backsplash that looks custom and considered rather than grabbed off a shelf.
- Use small format tile for the cleanest herringbone lines
- Stick to a neutral palette to let the pattern shine
- Budget extra time for cuts at the edges
21. Zellige Tile for the Sink

Zellige tile brings handmade texture and slight color variation that machine-made tile just can’t fake. Every piece is a little different, giving your sink backsplash an organic, artisanal feel that photographs beautifully. It’s a favorite among designers for a reason, even if it costs a bit more per square foot.
- Choose a single color family for a cohesive, textured look
- Expect slight imperfections — that’s the whole appeal
- Use minimal grout lines to let the tile’s texture show
22. Penny Tile Backsplash Charm
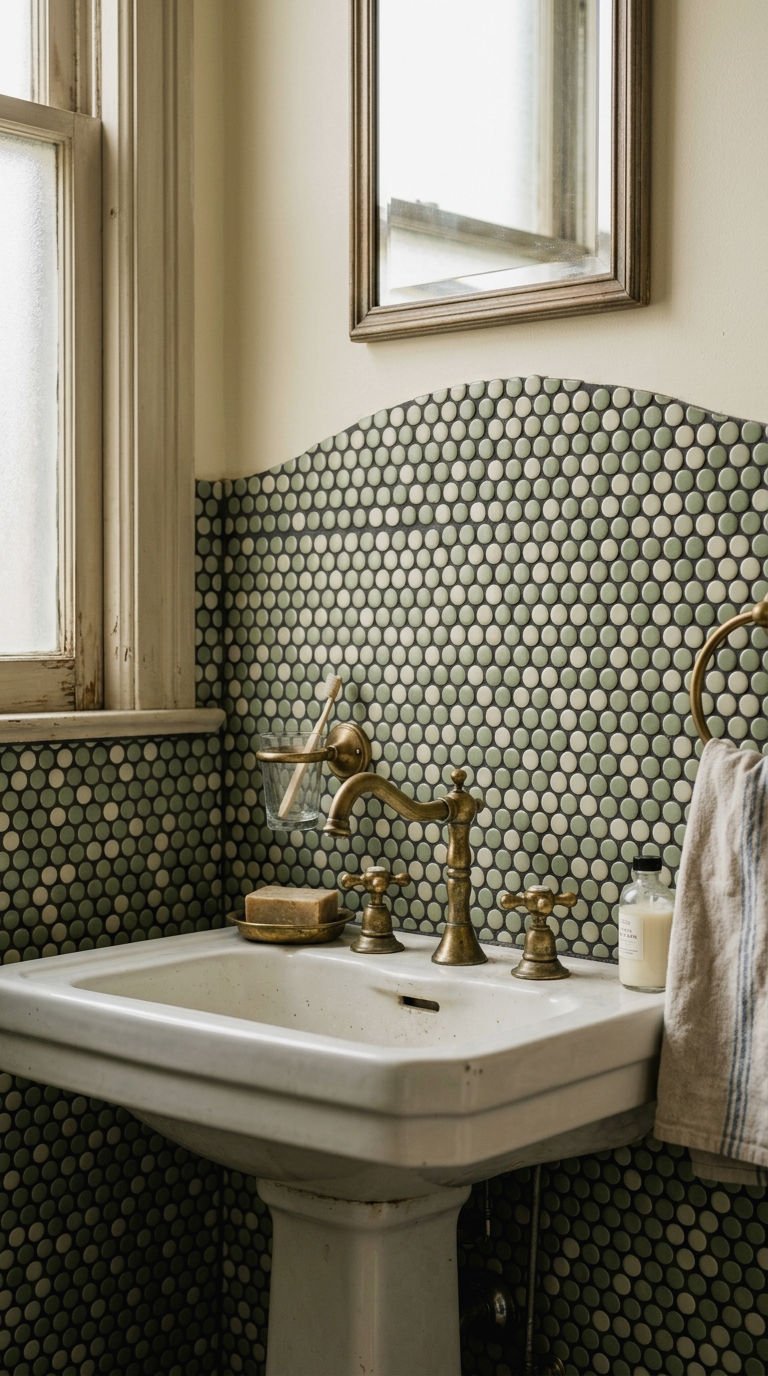
Tiny round penny tiles bring a playful, vintage energy to a sink wall, especially in older homes trying to stay true to their original character. The small scale also makes them great for wrapping around plumbing fixtures without awkward cuts. It’s a detail people notice, even if they can’t say why.
- Pick a two-tone pattern for added visual interest
- Use darker grout to make the circles pop
- Pair with vintage-style fixtures for a cohesive theme
23. Wood Look Tile Backsplash
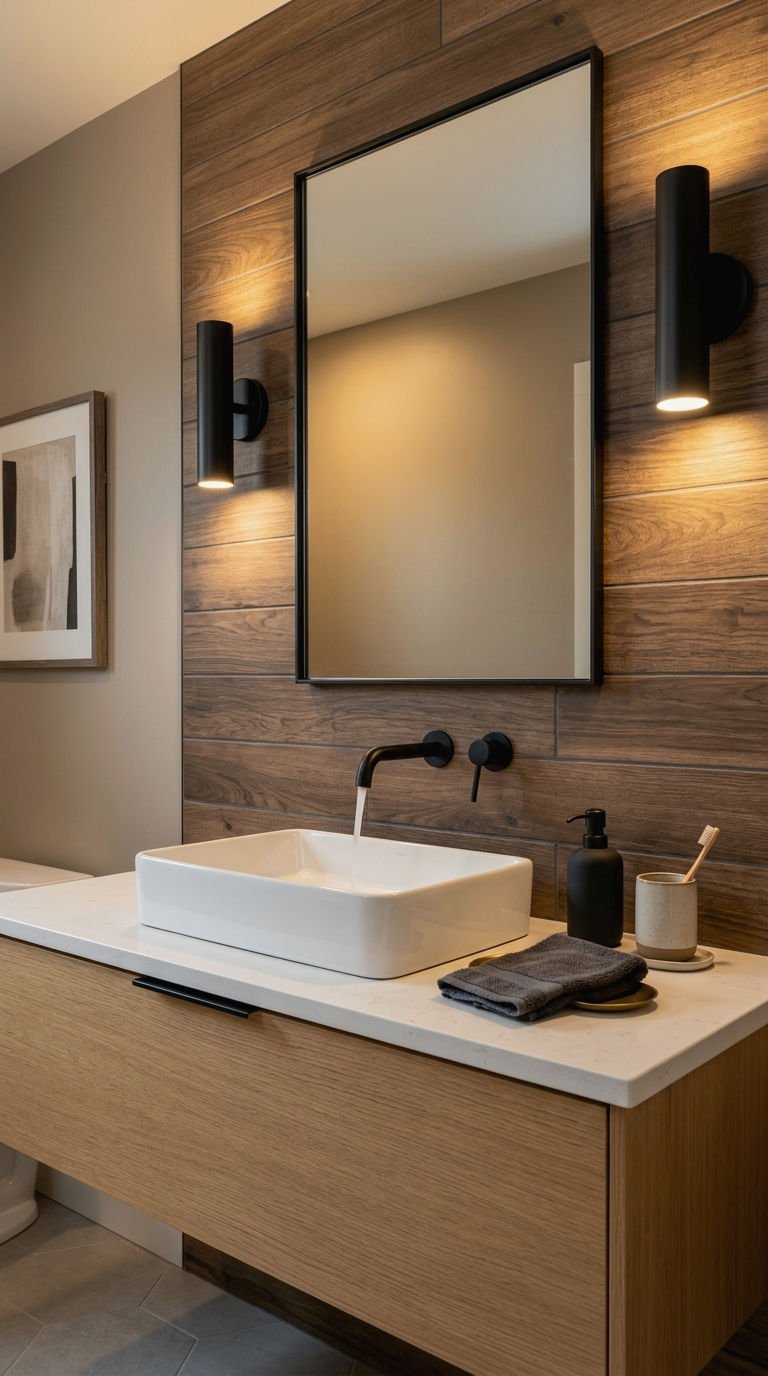
Wood-look tile gives you the warmth of a natural material with none of the water-damage anxiety real wood brings to a bathroom. Behind a sink, it softens the space and pairs beautifully with black or brass fixtures for a warmer, more organic feel than typical ceramic options.
- Lay planks horizontally for a calming, grounded look
- Choose a matte finish for the most realistic wood texture
- Pair with warm-toned lighting to enhance the effect
24. Colorful Tile Backsplash Pop
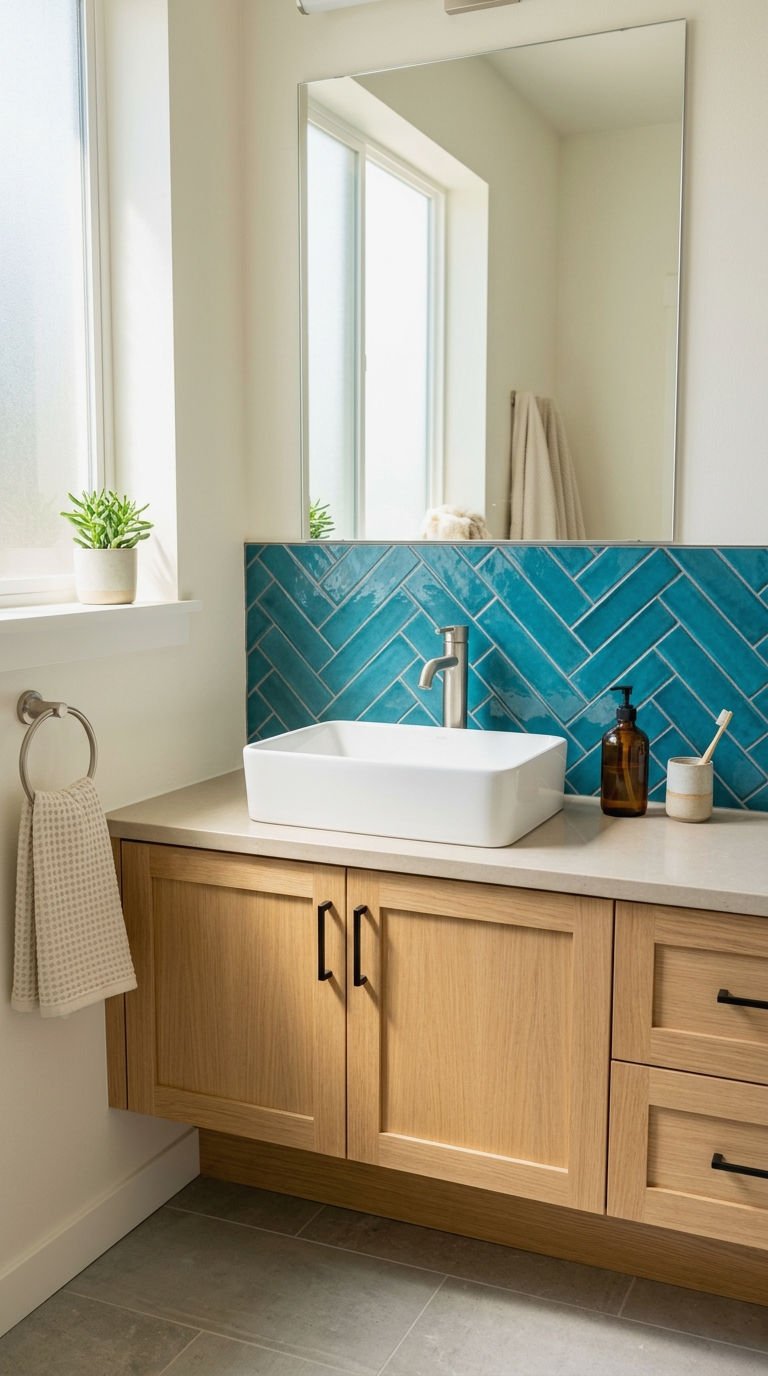
Bathrooms don’t have to be all white and beige — a punch of color behind the sink can genuinely transform the whole room’s mood. Blues, greens, and terracotta tones are having a real moment right now, and a colorful backsplash is a low-commitment way to try them out.
- Test a sample tile in your bathroom’s actual lighting first
- Balance bold color with neutral countertops and cabinetry
- Use color only behind the sink to keep it from overwhelming
25. Natural Stone Sink Backsplash

Travertine, slate, and limestone bring an earthy, spa-like feel that tile alone rarely achieves. Natural stone behind the sink adds texture and subtle color variation, making the whole vanity area feel more like a boutique hotel than a standard bathroom. It does need periodic sealing, so factor that into your maintenance routine.
- Seal the stone annually to prevent staining
- Choose a honed finish for a softer, matte look
- Pair with warm wood vanities for a cohesive spa feel
26. Budget Friendly Backsplash Tricks

You don’t need a huge budget to upgrade this wall — sometimes the smartest move is a small one. Basic ceramic tile, a fresh coat of paint plus a clear sealant, or a single row of accent tile can all deliver a finished look for way less than a full renovation.
- Shop discontinued or clearance tile for major savings
- Limit the backsplash size to cut material costs
- Use paint plus sealant as a temporary, budget-friendly fix
27. Statement Wallpaper Backsplash
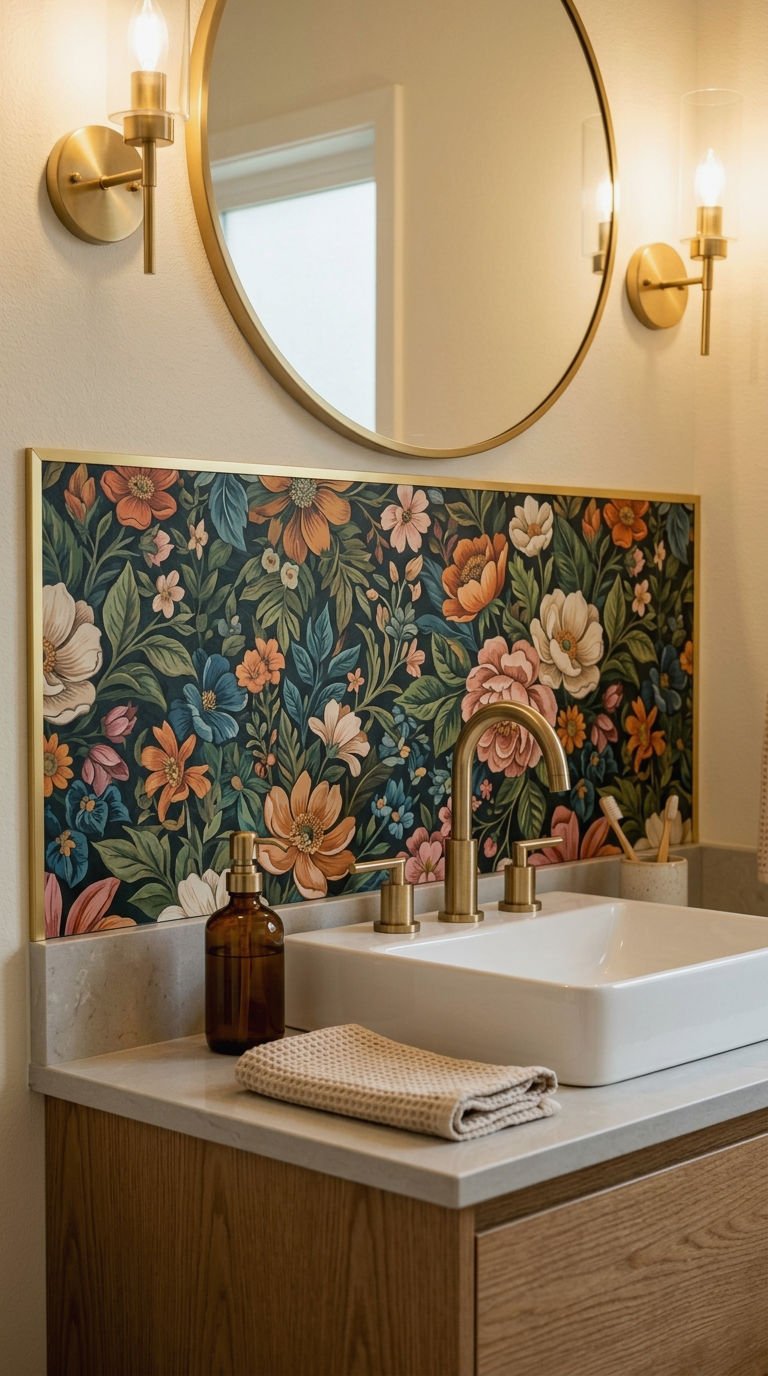
Yes, wallpaper — but the waterproof, vinyl-coated kind made to handle splashes. A peel-and-seal wallpaper backsplash behind the sink gives you pattern options tile just can’t match, from florals to bold graphics, without any grout or tile cutting involved. It’s a genuinely underrated option people sleep on.
- Choose vinyl or laminate-coated wallpaper rated for bathrooms
- Add a clear sealant coat over the top for extra protection
- Frame the edges with thin trim for a finished look
Frequently Asked Questions
Do I really need a backsplash behind a bathroom sink? You don’t strictly need one, but it protects your wall from water damage, soap residue, and staining over time. Even a simple, budget-friendly option is better than leaving drywall exposed to daily splashes.
What’s the easiest backsplash to install myself? Peel and stick tile or waterproof wallpaper are by far the easiest DIY options. Both skip the mortar and grout process entirely, making them doable in an afternoon with basic tools.
How tall should a bathroom sink backsplash be? Anywhere from 4 inches for a minimal splash guard up to full height for a statement wall works, depending on your style goals. Most standard installs land somewhere between 4 and 18 inches.
Does backsplash tile need to match the shower tile? It doesn’t have to, but matching or complementary tile creates a more cohesive, intentional look throughout the bathroom. Mixing materials works too, as long as the tones and finishes feel connected.
Conclusion
There’s a backsplash idea on this list for every budget, skill level, and bathroom size, so there’s really no excuse for that bare wall behind your sink anymore. Whether you go all-in with marble or keep it simple with peel and stick tile, the goal is the same: protect your walls and make the space feel finished. Pick the one that fits your style, grab your tools (or your phone to call a tiler), and get that sink wall looking like it belongs there.
